How To Connect Metamask To Binance?
Comprehensive Tutorial on Linking Metamask with Binance: Easy Steps for Smooth Cross-Platform Access
By reading the article “How to connect Metamask to Binance” published in Adaas Investment Magazine, you will get acquainted with how to install the Metamask wallet and how to transfer your funds from the Binance exchange to the Metamask step by step. This level of familiarity can be enough when you need educational information about this topic.
The podcast is published for you!
Table of Contents
Metamask wallet and Binance
Centralized cryptocurrency exchanges are providing various services to their users so that they can gain more market share in competition with other exchanges. Among these services, supporting popular wallets such as Metamask is one of the most important features for users.
Binance exchange, as one of the leading exchanges providing cryptocurrency services, supports the Metamask wallet in its various products such as Binance NFT. In order to connect Metamask to Binance, we need to follow important points that we have reviewed for you in the following along with the tutorial on how to connect Metamask wallet to Binance exchange.
Step 1 – Install and Setup Metamask Wallet
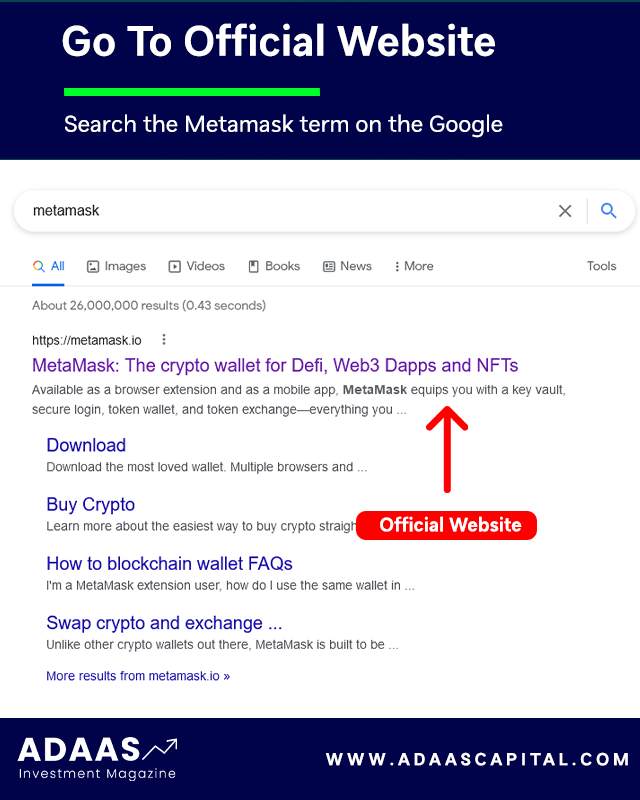
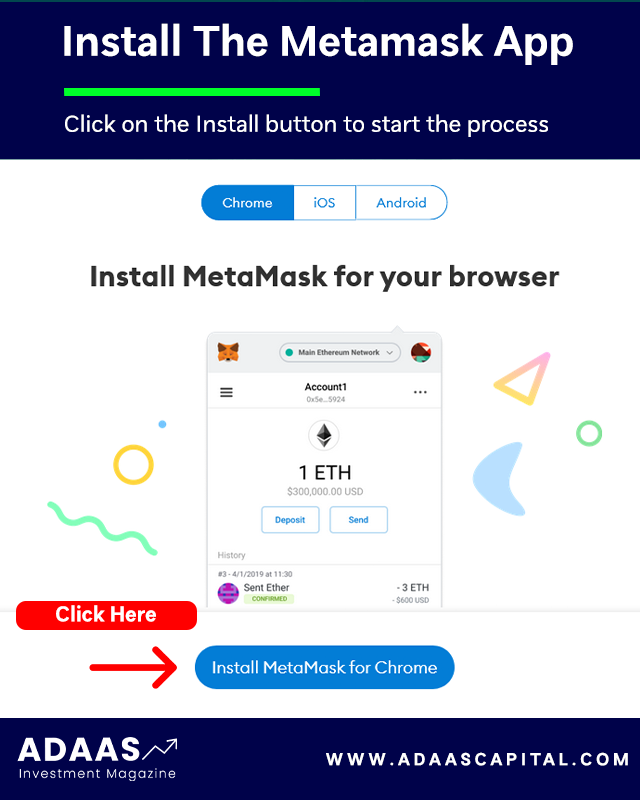
To install the Metamask wallet for desktop or mobile devices, the best way is to visit the official website at www.metamask.io and You can also Google the name of this wallet and finally enter the Metamask wallet official website. On the main page of this website, the Download Now button will take you to a page from which you can download the software version suitable for your mobile or computer.
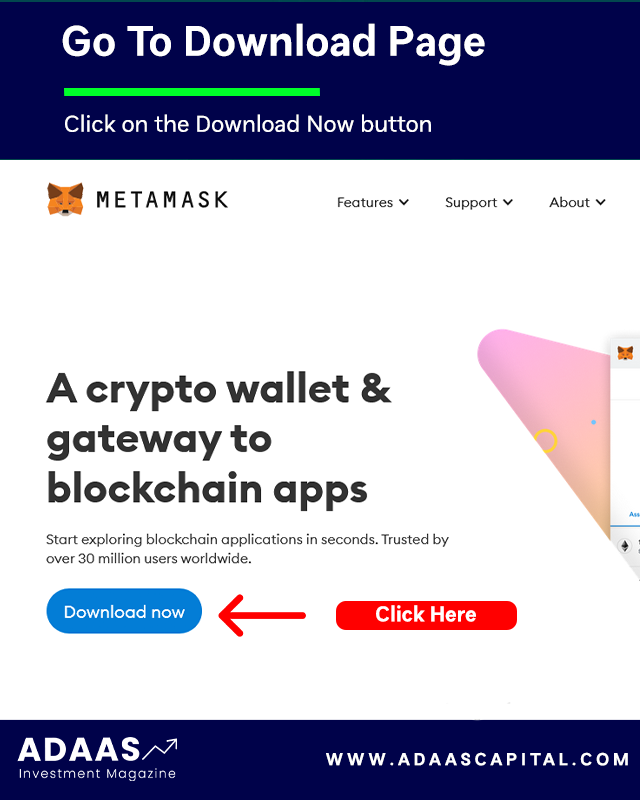
On the Download page, your device’s operating system will be automatically detected and the download option will be displayed. Of course, if needed, you can also download and use the versions of other operating systems.
Metamask Wallet is developed and can be installed for Android, iOS and Chrome, Firefox, Brave, and Edge browsers.
For example, in this tutorial, we will install this wallet for the Chrome browser. After clicking on the “Install MetaMask for Chrome” option, we will be redirected to the official installation page of this extension.
Then on this page, we click on the “Add to Chrome” button and it asks us for permission to install it, and to do this, we click on the Add Extension button, and finally, the message that the MetaMask extension is successfully installed will be displayed to us.

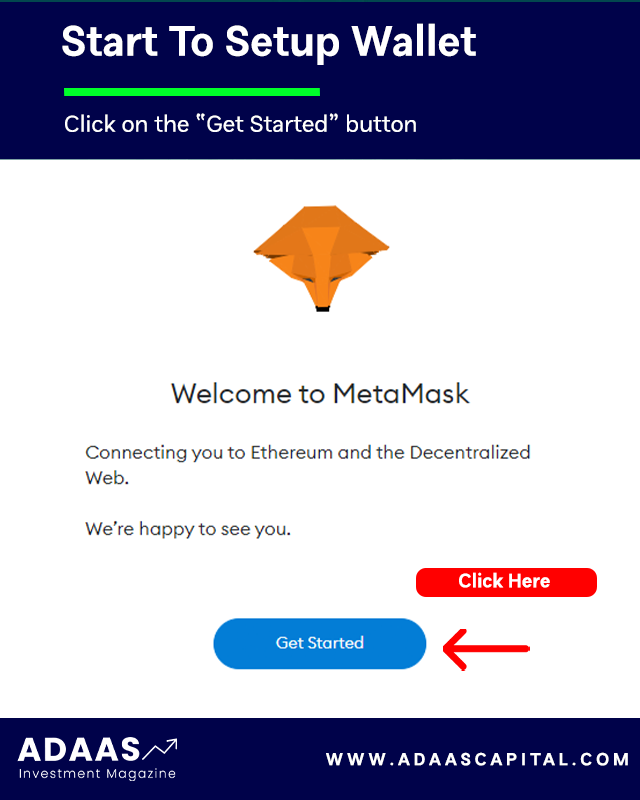
By clicking on the Metamask logo in the Chrome browser extensions section, we will enter a page that starts the setup process by clicking on the “Get Started” button. On the new page you will be asked to select:
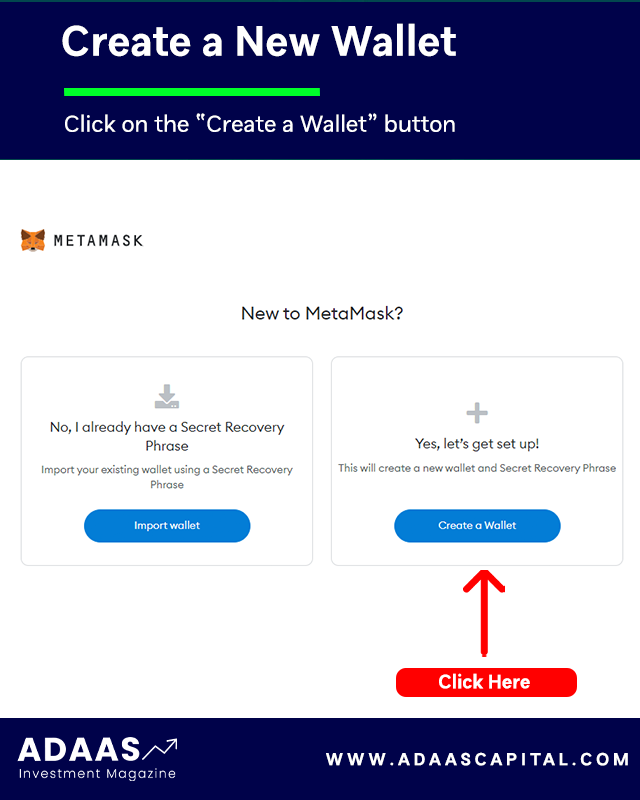
- Left option: Import an existing wallet by its recovery phrase.
- Right option: Create a new wallet for you.
In this tutorial, we want to create a new wallet for ourselves, so we select the right option, Create a Wallet.
The new page asks you for access to grab information such as pages visited in the software by users (Page Views) to collect and analyze them, and to apply optimizations to improve the user experience. Also, you can select the “No Thanks” option if you do not want to allow it.
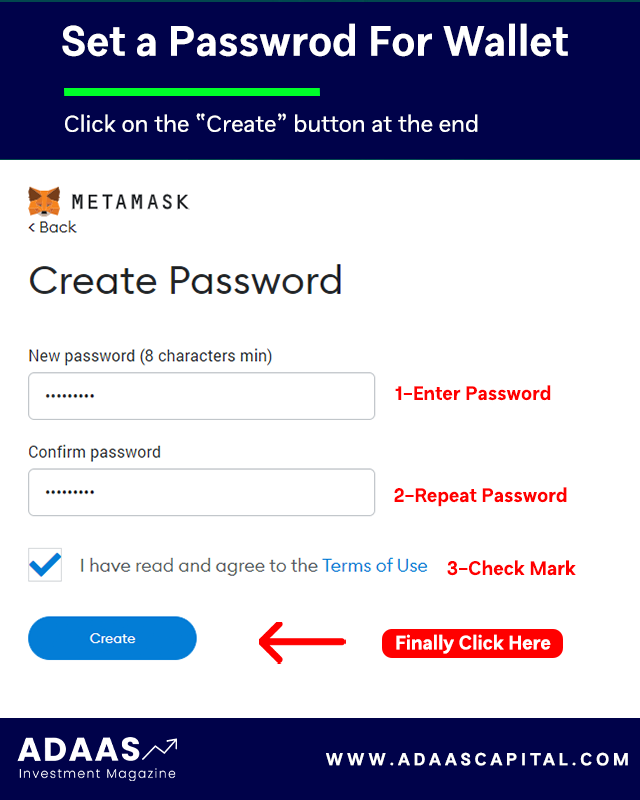
Next, you need to enter a strong password to log in to the Metamask wallet and re-enter it in the second field to confirm it, and finally check the Term of use option and at the end click the Create button.

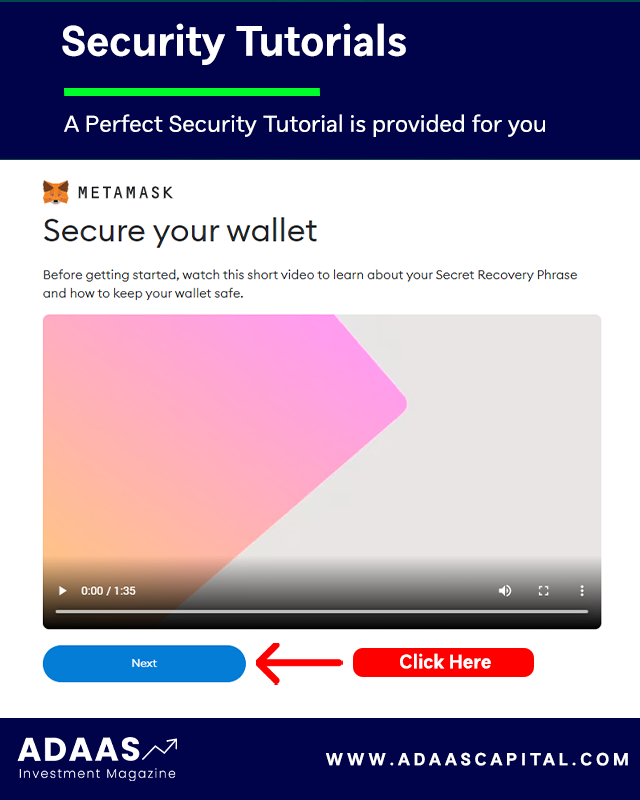
A tutorial has been prepared for you to provide more security for the Metamask wallet, which you can view if you wish so that you can learn valuable tips for free therefore you can keep your wallet safe and secure from possible attacks by hackers or thieves.
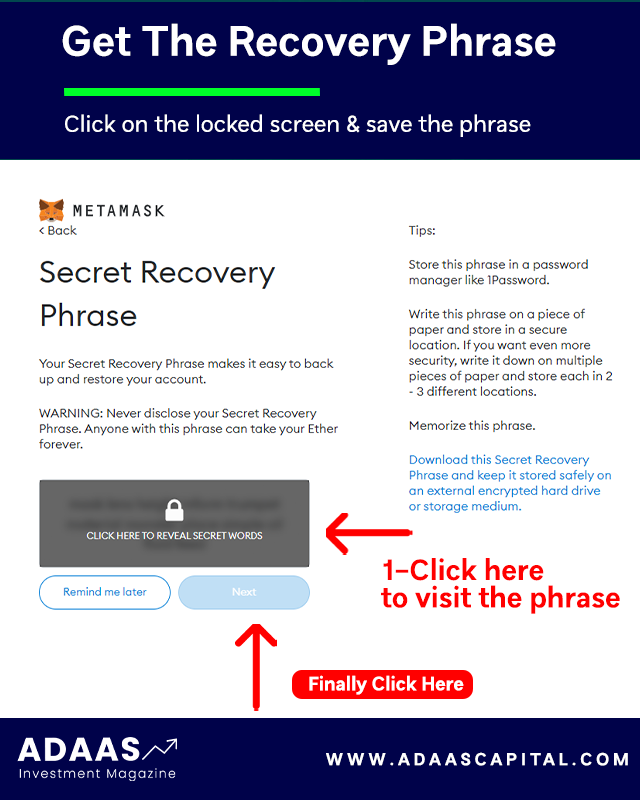
After viewing the tutorial, you will enter a very important page that displays the wallet recovery phrase for you. Keep these recovery words in a safe place so you can use them to recover your wallet if needed.
Note that access to wallet recovery phrase is equivalent to access to all digital assets stored in that wallet, so it is best to be diligent in keeping it secure!
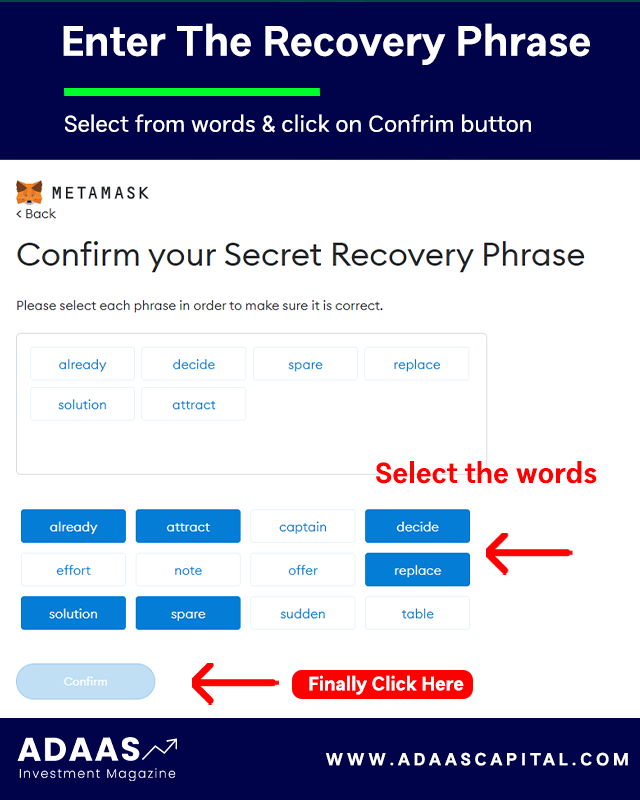
After noting the recovery phrase, click the Next button to be redirected to the page where you want to enter them. On this page, you have to enter the 12 recovery words that you wrote down in the previous step and finally click the Confirm button.
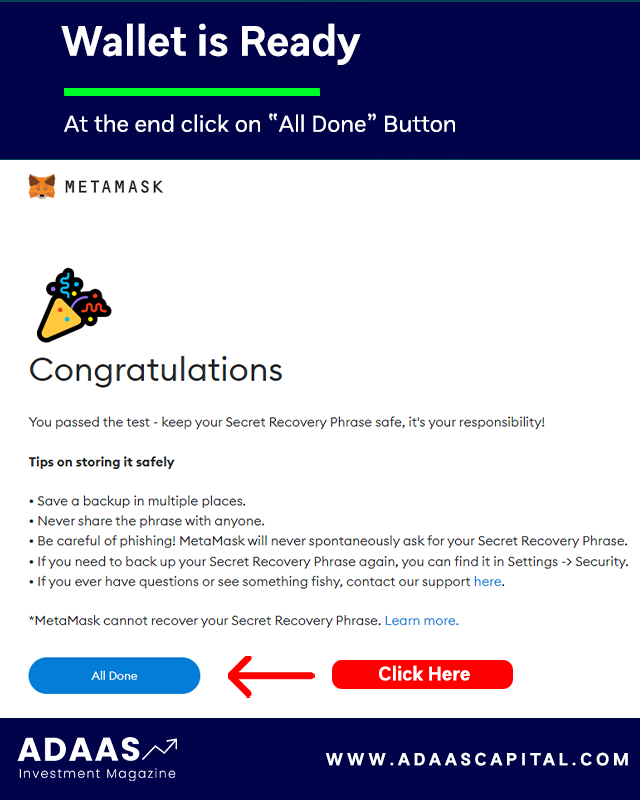
If you have done all the steps correctly, you will be presented with a congratulations page, which means your wallet is made by Metamask software. After clicking on the All Done button, you will be directed to the Metamask wallet software environment.
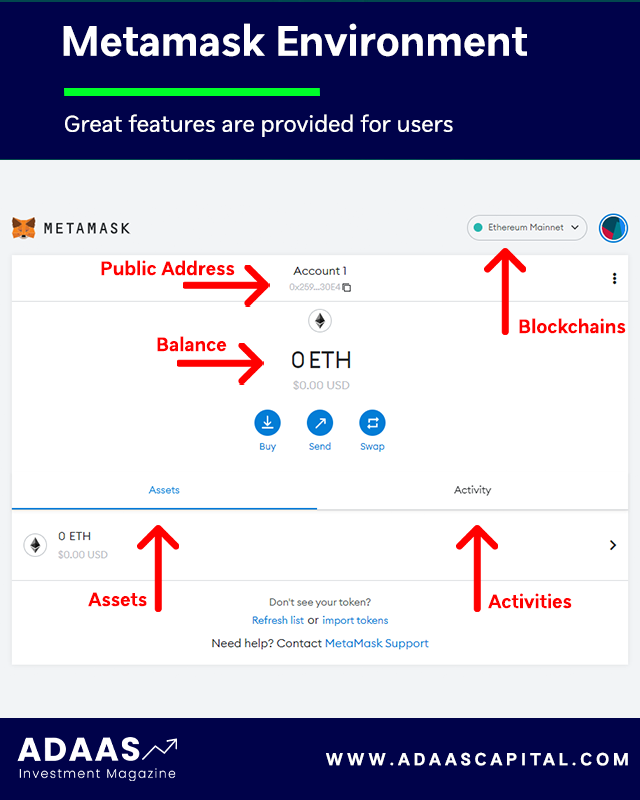
This page displays information such as the type of blockchain, the amount of assets stored, past activities, the public address of the wallet, the button to add tokens, and other features.
Note that the steps we went through are the same for installing and launching Metamask wallet on other operating systems such as Android or iOS, and you can use this tutorial to install Metamask wallet on mobile as well.
Step 2- Connect Metamask to Binance
One thing to note is that centralized exchanges such as Binance or Coinbase use internal wallets to store their users’ digital assets.
These internal wallets do not exist in decentralized exchanges such as PancakeSwap or UniSwap, and users need to connect their cryptocurrency wallets to execute their transactions.
In order to be able to transfer your cryptocurrencies from your account in the Binance exchange to your Metamask wallet, you must go through the steps that we have explained to you.
The first step is to add the desired blockchain to Metamask
Metamask wallet requires a simple configuration to display the addresses of different blockchains so that you can add the desired blockchain to it.
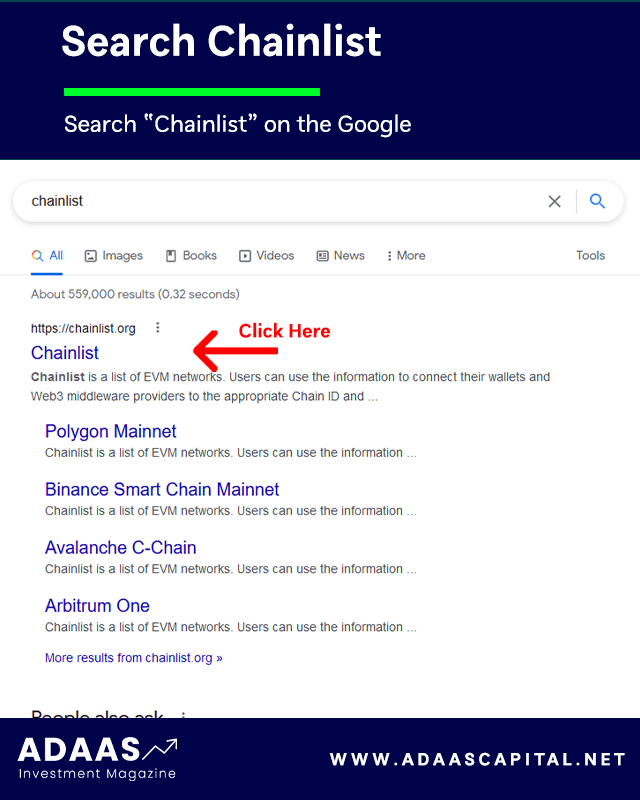
For this, we will use the Chainlist website. You can enter this site by searching its name on Google to enter the official version.
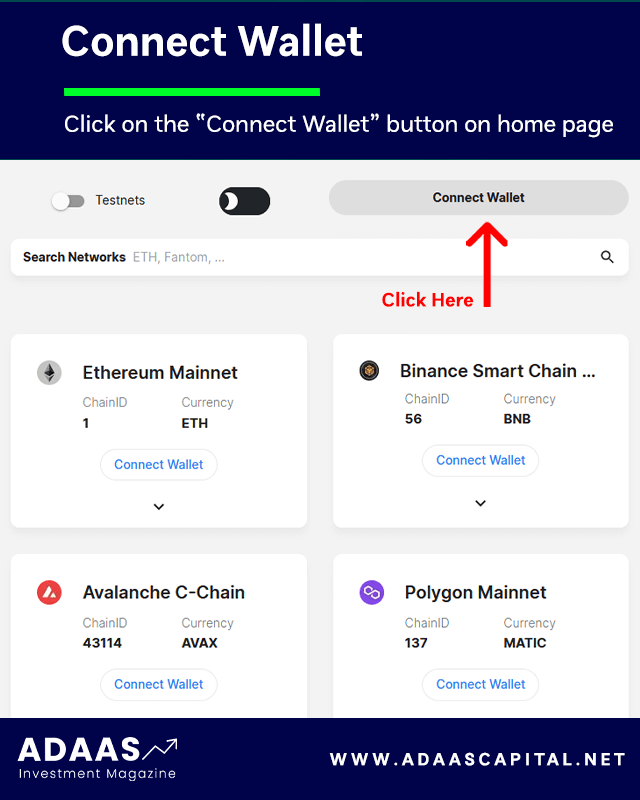
After being on the home page of this website, click on the “Connect Wallet” button so that you can connect your Metamask wallet to this platform.
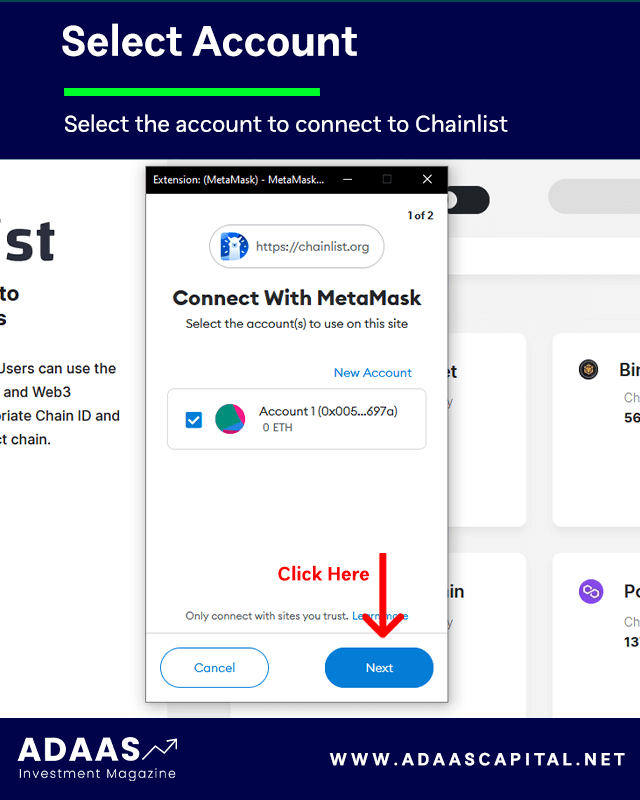
After that, a new window will open for you and Metamask wallet will ask you to choose which account you want to connect to. In the next step, it will ask you for permission to access the Chainlist website, which will connect your Metamask wallet by clicking the “Connect” button.
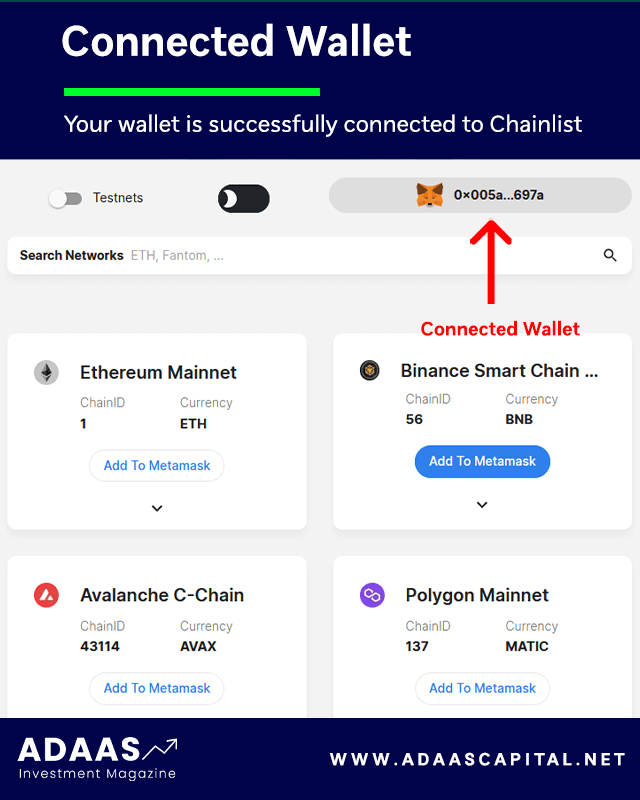
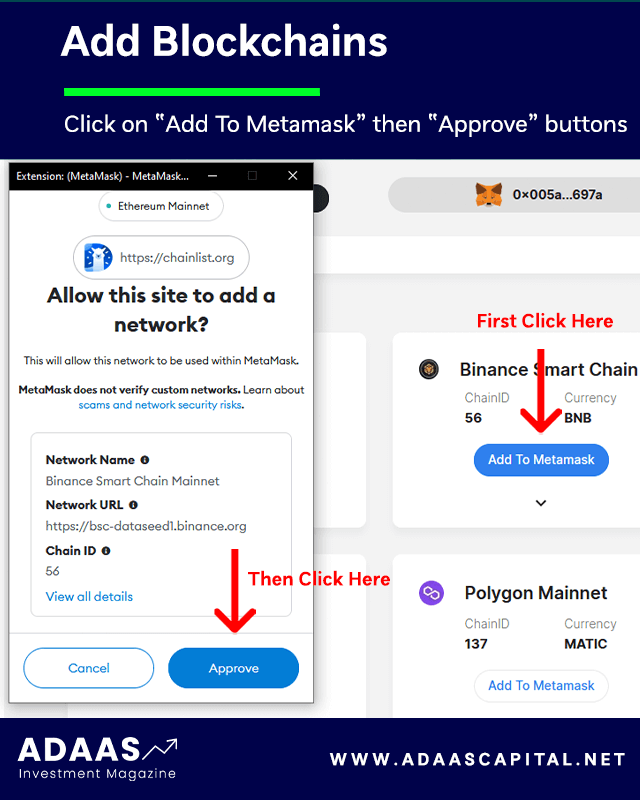
In the section where blockchains are displayed, search for the name of the blockchain you want and click on the “Add To Metamask” button. In this tutorial, we are going to add the Binance Smart Chain blockchain.
In the next step, the Metamask wallet will ask you to issue permission to add blockchains by the Chainlist website, for which you must click on the “Approve” button.
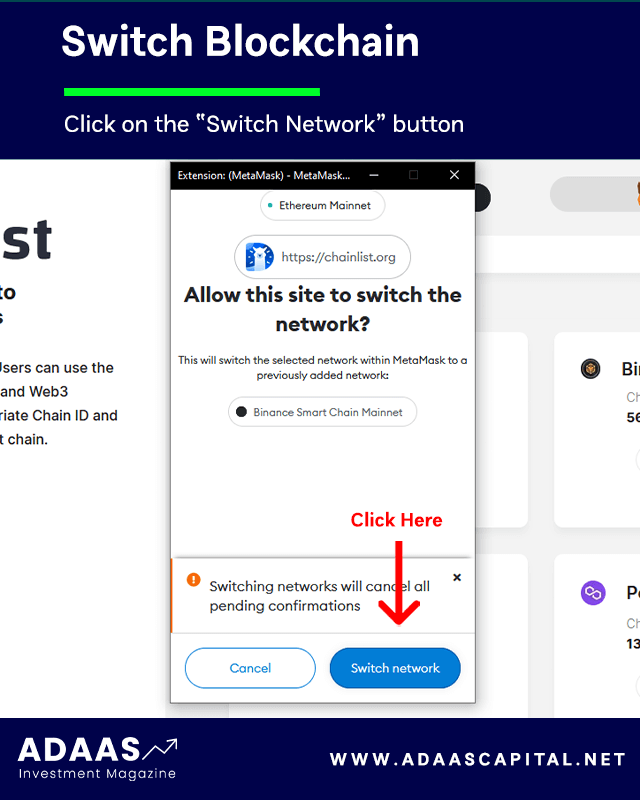
After that, Metamask wallet will ask you to switch blockchain, which you should take into account that if you confirm this, it will cancel all the pending transactions in the previous blockchain. For this, we click on the “Switch Network” button.
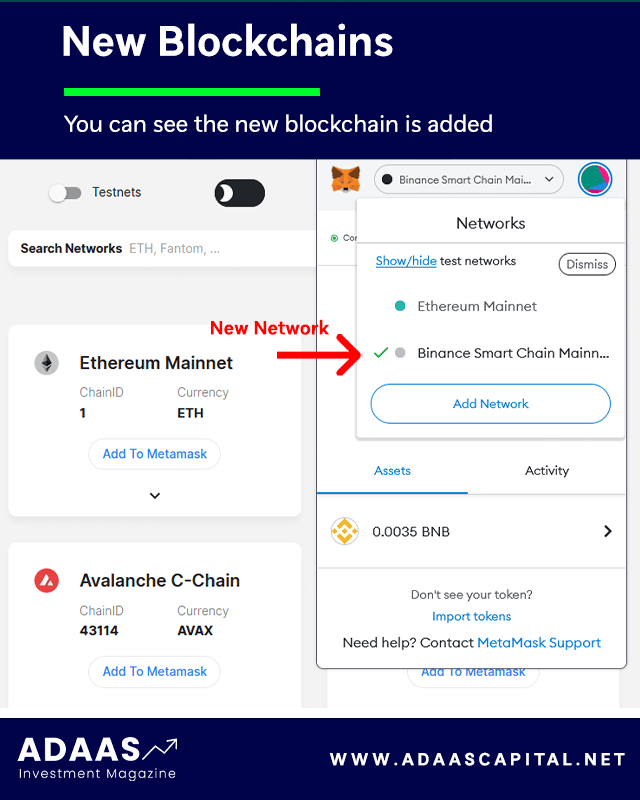
If you have done all the steps correctly, you can see that the new blockchain has been added to your wallet and you can click on your account address to have copied for you.
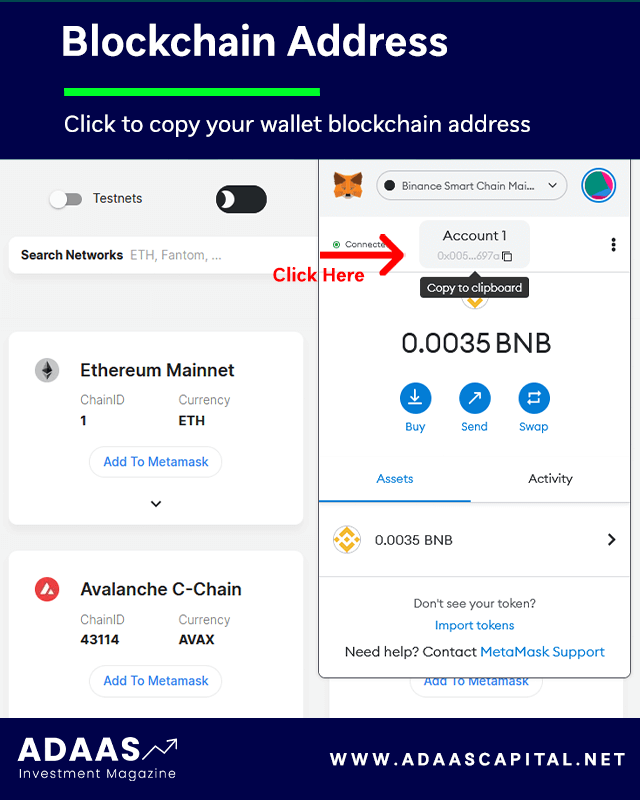
The second step is withdrawal from the Binance account to Metamask wallet
To transfer your assets from the Binance exchange to your Metamask wallet, you must enter your Metamask wallet address in the destination wallet address field when withdrawing assets from your Binance account.
Please note that for each cryptocurrency consider whether it is a coin or a token and enter the correct blockchain address to minimize the risk of losing your assets.
If you are not familiar with the process of withdrawing cryptocurrency from the Binance exchange, we suggest that you use the tutorial published on the official Binance website. For this, you can use the following link:
The End Words
At Adaas Capital, we hope that by reading this article you will be fully immersed in How to connect Metamask to Binance. You can help us improve by sharing this article which is published in Adaas Investment Magazine and help optimize it by submitting your comments.
FAQ
Does Binance support Metamask wallet?
Yes, in some products such as Binance NFT, you can connect your Metamask wallet to the platform.
How to connect Metamask to the Binance exchange?
Binance exchange has an internal wallet for its users’ funds, but you can transfer your funds from or to your Metamask wallet.